Identify SERP features to target, and build tailored strategies to optimize on opportunities.
“I want to create a comprehensive SERP feature strategy for my site.”
Step 1: Investigate your SERP feature landscape
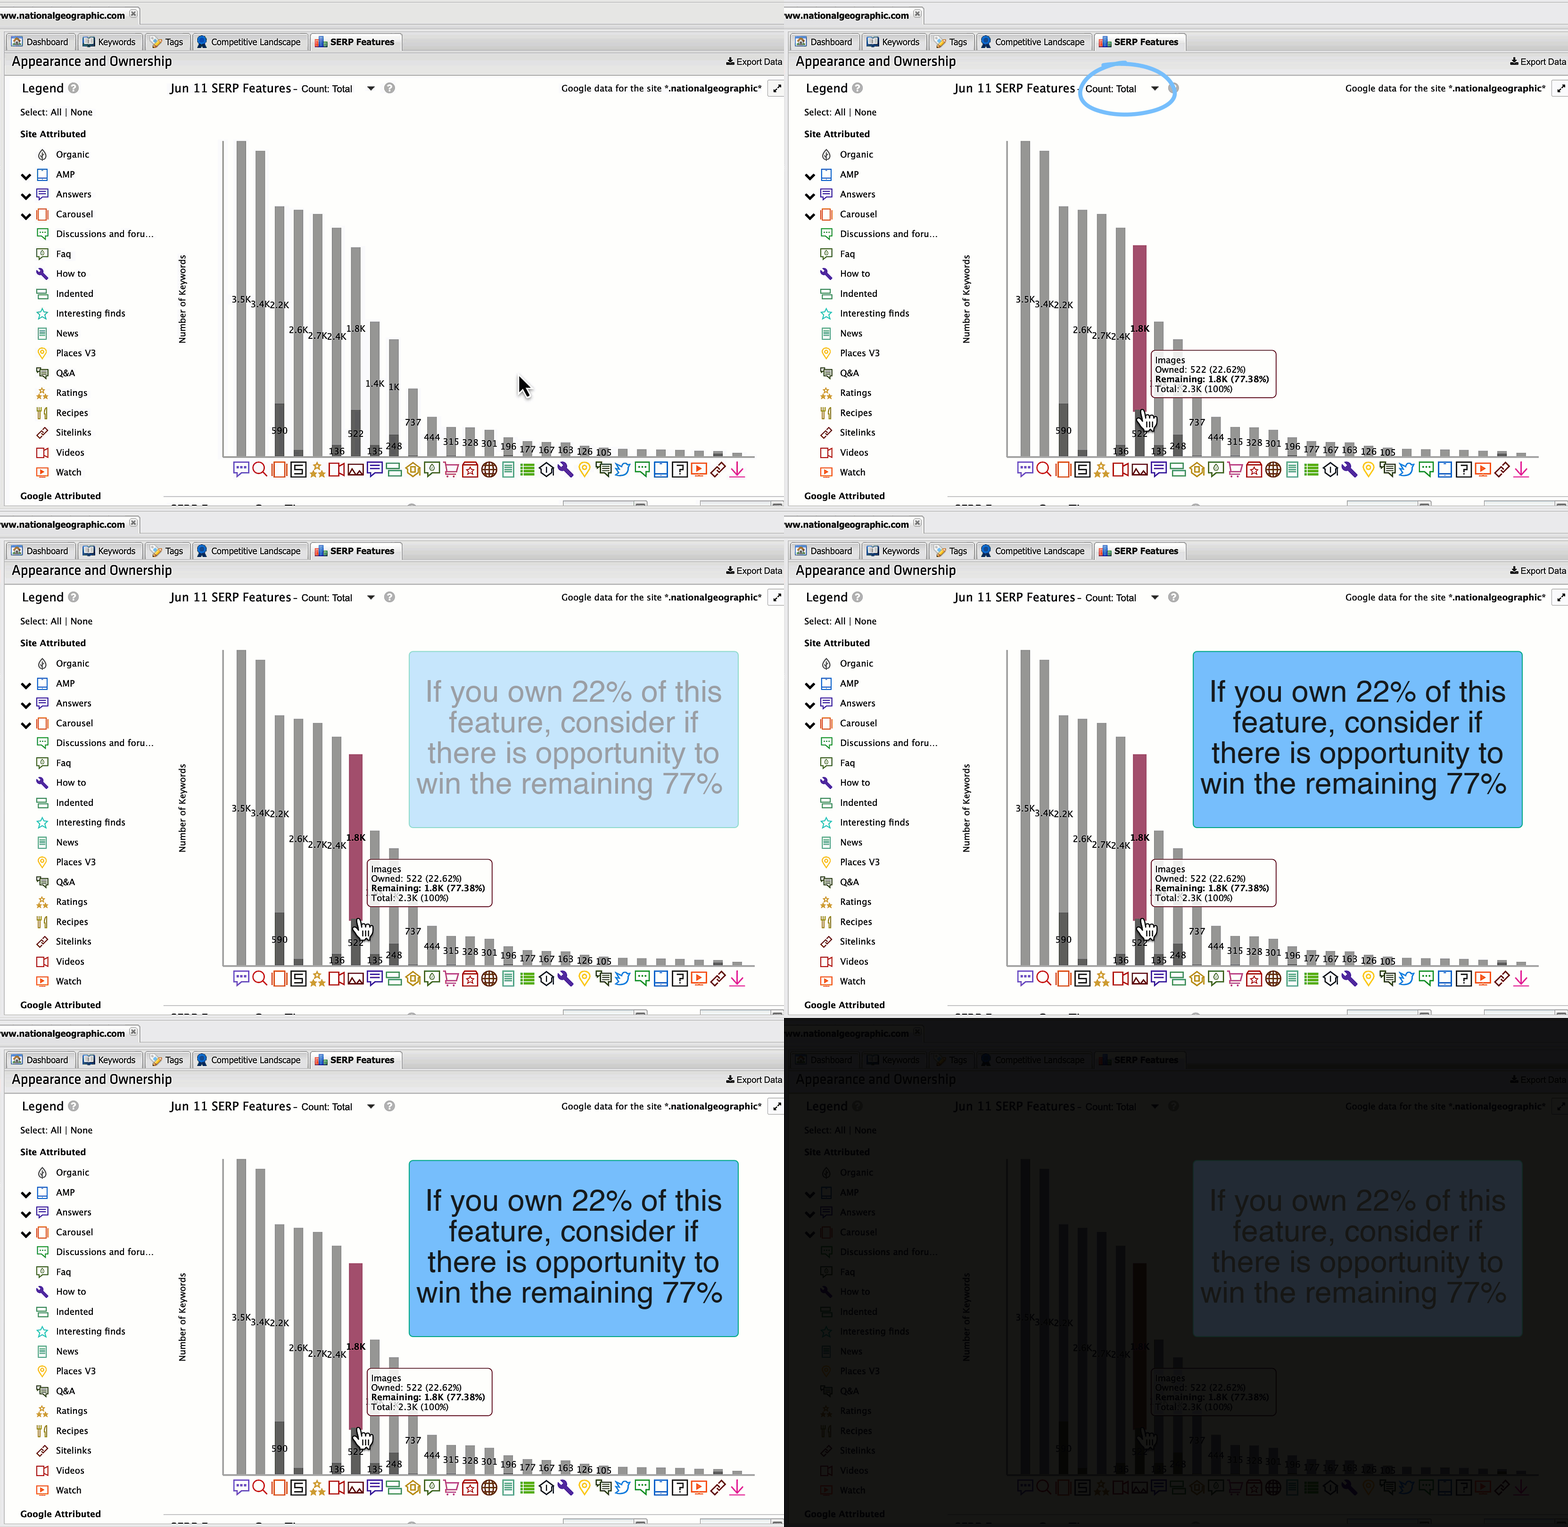
The SERP Features tab is a great starting place to identify potential opportunities. Open the tab and scroll down to the Appearance and Ownership section. The legend on the left shows the SERP features that are being triggered for your keywords.
Step 1a: Identify your most common SERP features
Take a look at the current day’s SERP Features graph and toggle on Count: Total. This will show you the total number of keywords that produce a given SERP feature so you can identify the features that appear most in your space.
Step 1b: Check each SERP feature’s visibility
Next, choose SoV: Total on the graph to see the total share of voice generated by each SERP feature. Just because a SERP feature appears a lot, doesn’t mean that it’s the most visible on the SERP. Remember, STAT’s share of voice metric measures the visibility of a given keyword set on Google (review how we calculate share of voice).
Step 2: Identify your target SERP features
Now that you understand your SERP feature landscape better, it’s time to pinpoint the specific features you want to build your strategy around. Your choices can depend on a number of factors:
SERP features that appear the most, drive the most visibility, match the type of content you typically serve, are the easiest to influence, are on the rise, or any combination thereof.
A good place to start is with the SERP features you already own and where there is an opportunity to own more of them. Understanding where you’re starting from will also help you benchmark your current state so you can ensure that you’re maintaining ownership and tracking your progress over time.
Check back in with the SERP Features graph, toggled to Count: Total, to see the number of SERP features surfaced within your keyword set, split into those you appear in and those you don’t.
Step 3: Set up SERP feature tracking
Once you’ve identified the SERP features you want to target, create dynamic tags to track the specific keywords that trigger them. For each target SERP feature, we recommend setting up three different dynamic tags: total, owned, and unowned (review the properties of a dynamic tag).
Creating a total tag will show you the total number of keywords returning the SERP feature. Monitor this tag to see whether Google is adding or removing features from your SERPs. An owned tag will show how many of the total SERP features you actually own. When you see this number go up, you’ll know your strategy is going in the right direction. An unowned tag will show you how many SERP features you have yet to own. This is one of the few numbers you want to see go down as you see the gradual results of your optimizations.
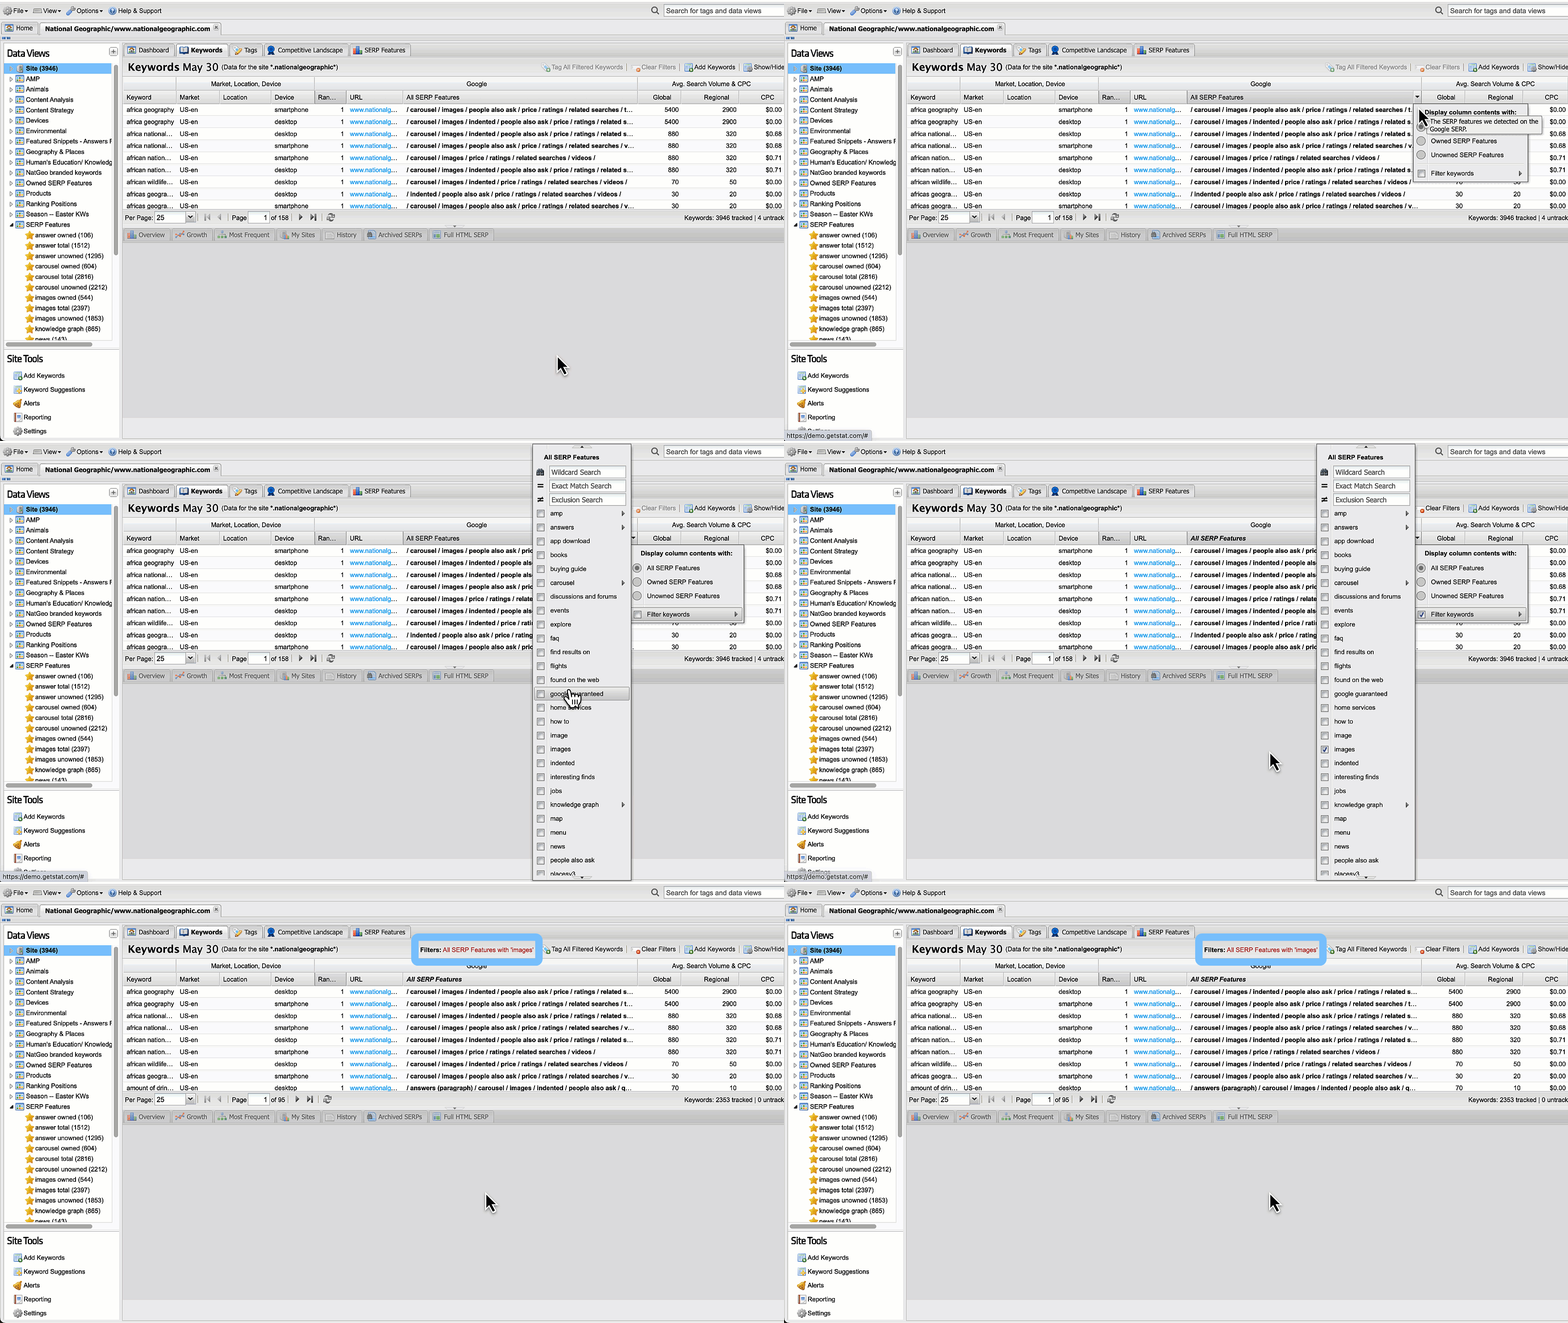
To begin, head to the Keywords tab and filter the SERP features column. Use the drop-down arrow in the column header to select All SERP Features, and then filter by the SERP features you wish to target. Select Owned SERP Features and Unowned SERP Features when creating the other two tags.
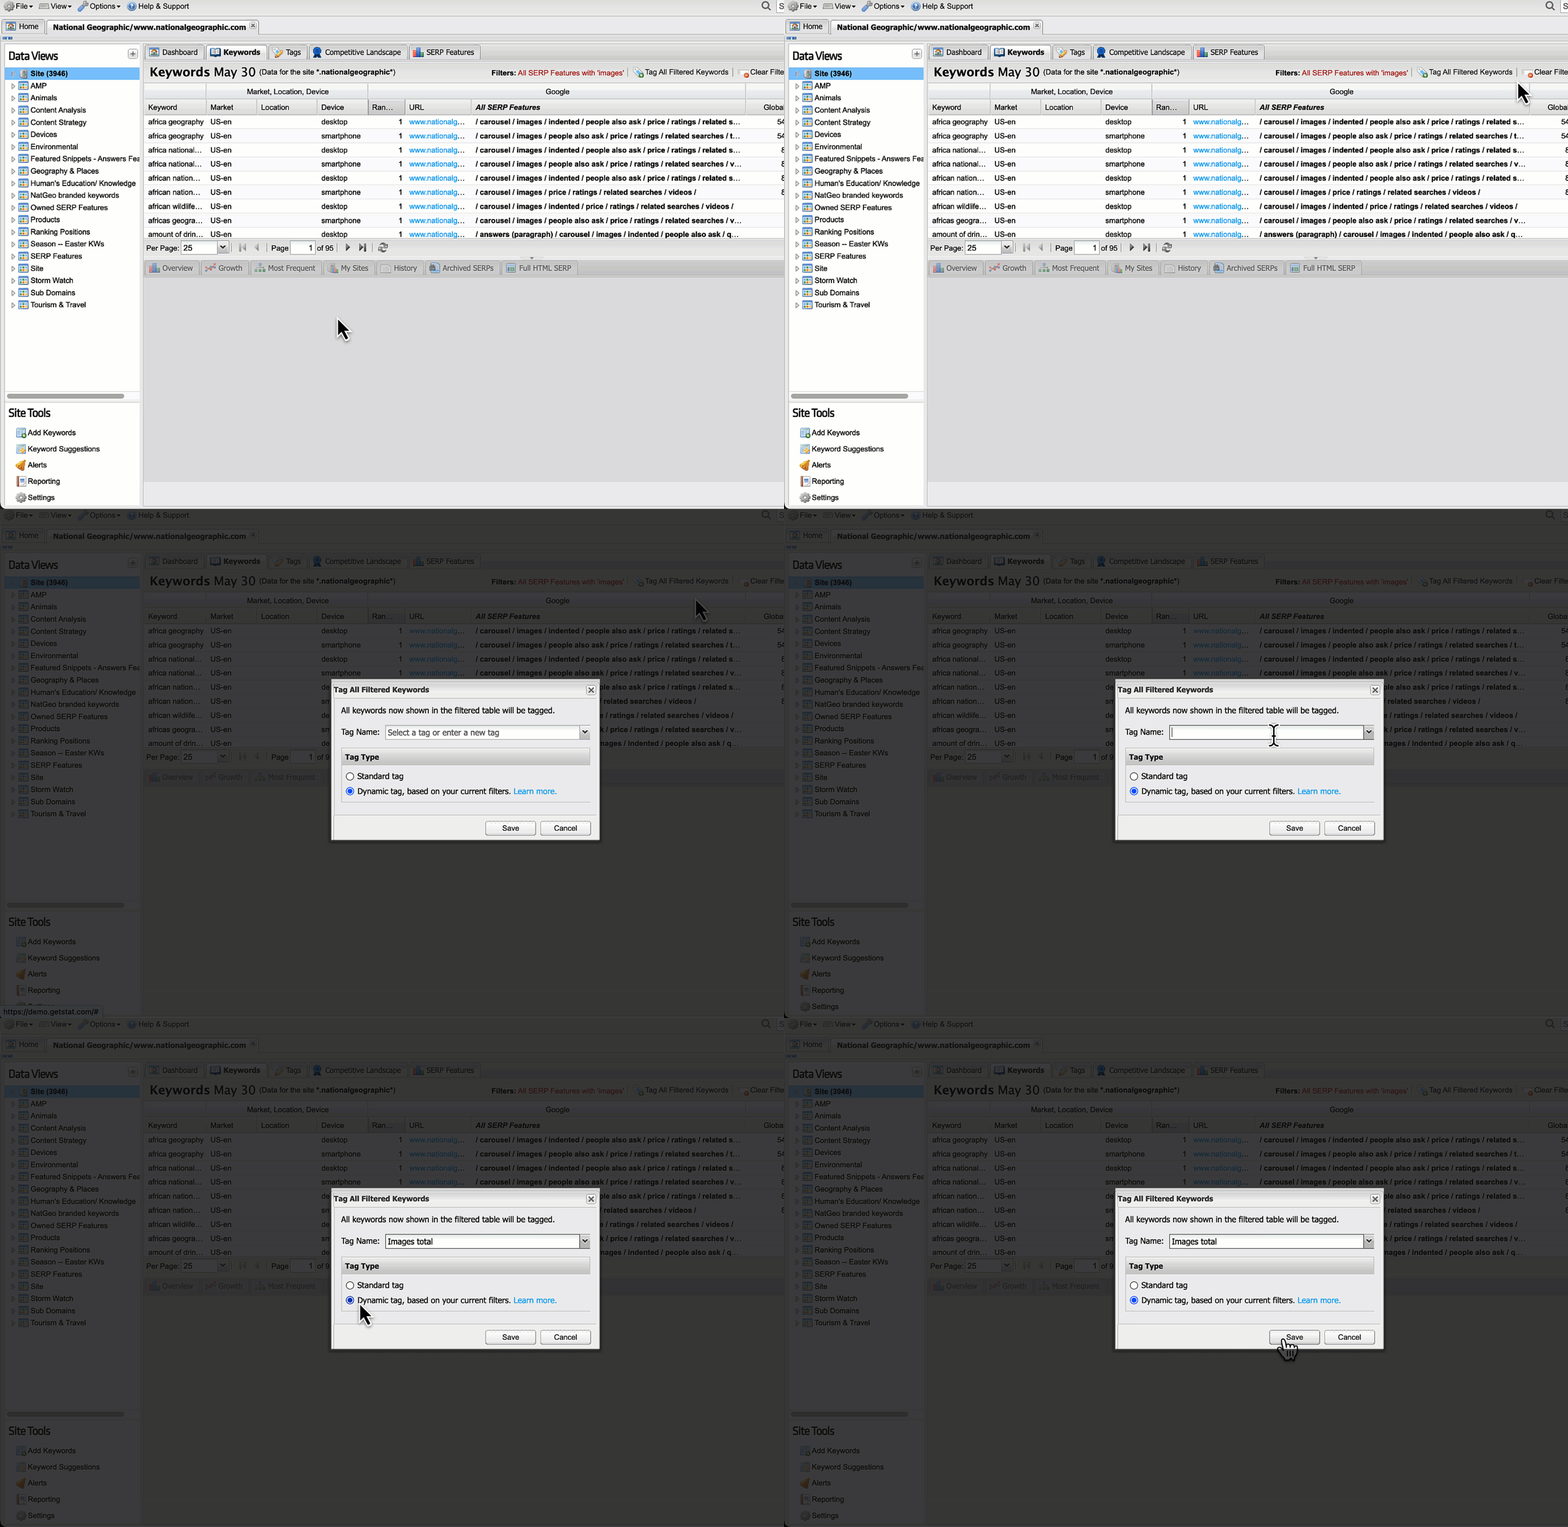
Next, save these filters as a dynamic tag. Click on the Tag All Filtered Keywords button. In the pop-up window give your tag a name, and select Dynamic tag, based on your current filters. In this example, we’ve named this tag ‘images total’.
Repeat this process to create dynamic tags for owned and unowned SERP features for your target feature.
Step 4: Identify strategic optimizations
Once you have segmented and tagged your keywords, it’s time to dig further into your SERP feature data.
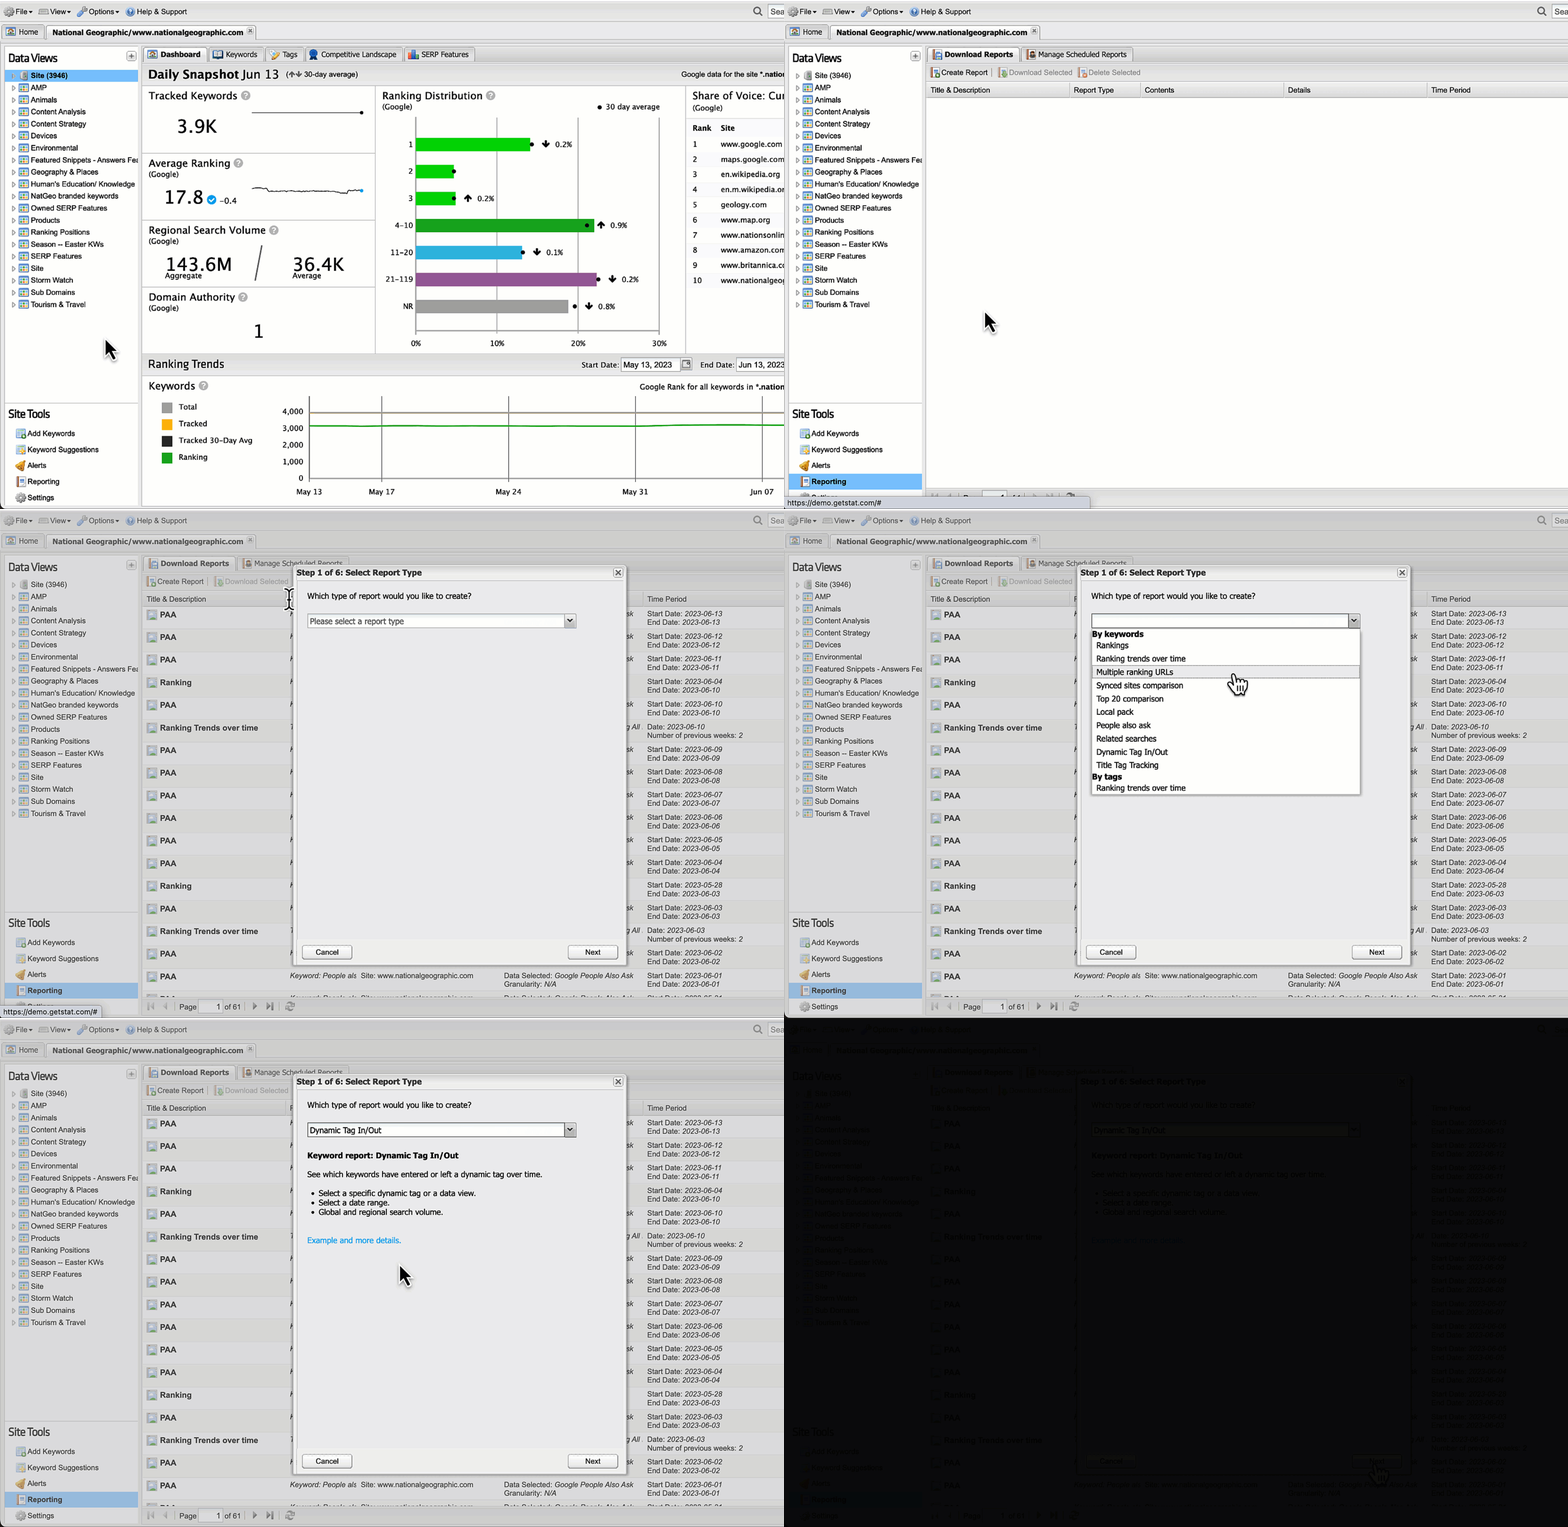
Download STAT’s Top 20 Comparison Report to see every SERP feature — along with its ranking position and URL — that appears in the top 20 Google search results for a given keyword set. This will allow you to discover strategic technical and/or content-related opportunities based on how and where your competitors are ranking.
To create the report, open the Reporting tab under Site Tools. Click the Create Report button and select Top 20 Comparison Report. Work through the six steps to select date ranges and data options and then download the report.
Step 5: Monitor tag performance over time
Track the performance of your dynamic tags over time to see the impact of your work. Use the Tags tab to compare your tags and identify which of your SERP features are seeing movement and require deeper investigation.
Make sure you’re at the Site level in the Data Views pane. Open the Tags tab, search for your tags using the drop-down filter option in the Tag Name column. Look at the rolling average 7, 14, 30, or 60-day trends, and percentage gain, or loss for keywords over that time.
Step 6: Monitor SERP feature ownership
Head to the SERP Features tab and scroll down to the SERP Features Over Time chart to get a visual guide to optimization successes.
Adjust the graph’s start and end date to your desired time period and select Count: Owned from the drop down menu. You can now see how your ownership is gaining ground over time.
Step 7: Analyze which keywords are moving in and out of your SERP feature tags
Download a Dynamic Tag In/Out report on your newly created tags to see which keywords are gaining or losing SERP feature ownership, or causing fluctuations in average rankings. To create a report, open the Reporting tab under Site Tools. Click the Create Report button and work through the six steps to select date ranges and data options.
Step 8: Share your progress with key stakeholders
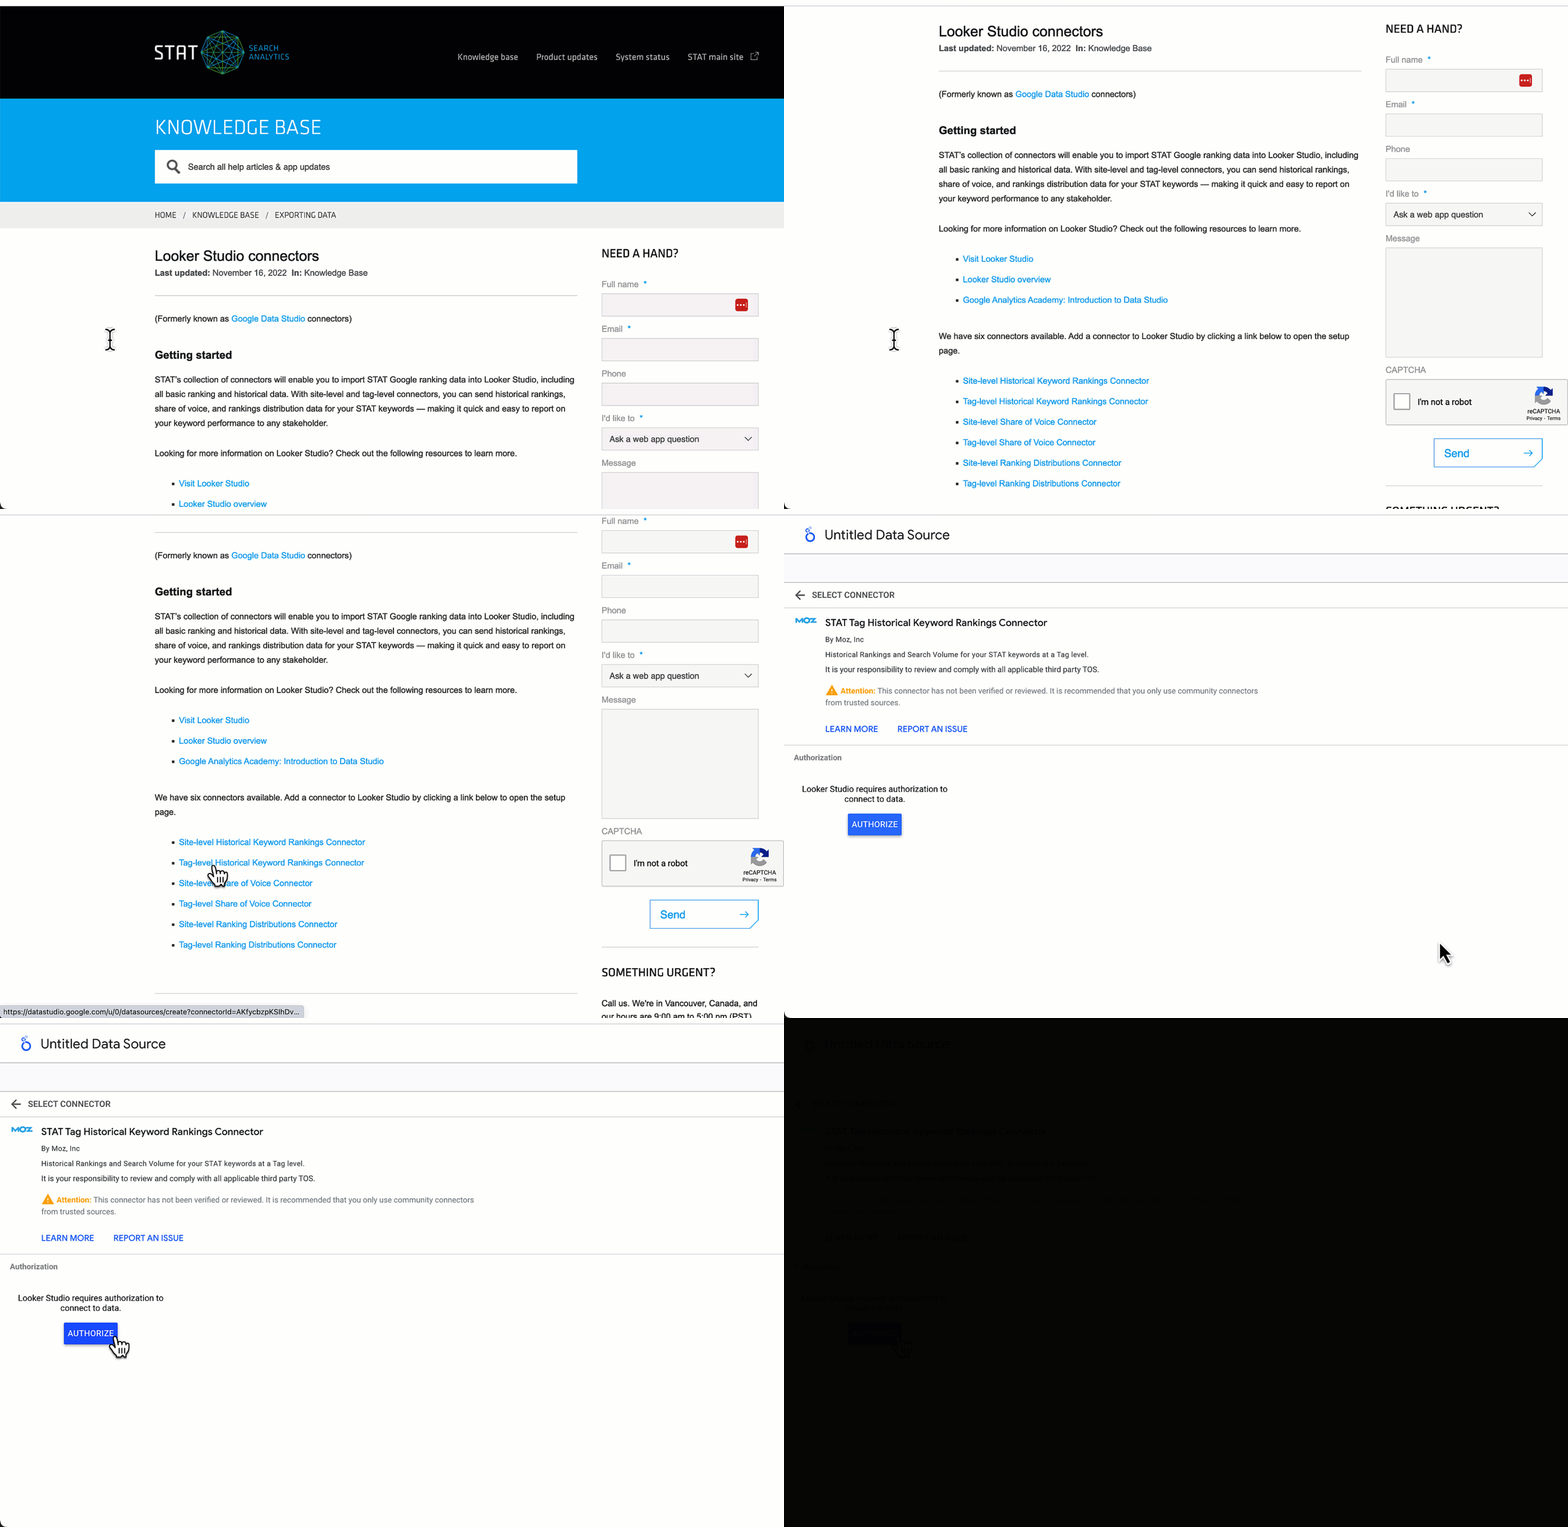
Import STAT ranking data directly into Google Looker Studio to easily report and create visualizations on specific tag performance. STAT’s Looker Studio Tag-Level Connectors are a great way to distill data down for a broader audience.
Open the Google Looker Studio documentation on the STAT Knowledge Base to review the setup process and add a connector.


