“I want to understand if Google has made a change to my displayed titles on the SERP, and if this has resulted in an increase or decrease in rank performance for my tracked keywords in STAT.”
Step 1: Select your project
Log in to STAT and open the project you want to work on from the Projects pane.
Step 2: Create a dynamic tag to capture high-value keywords
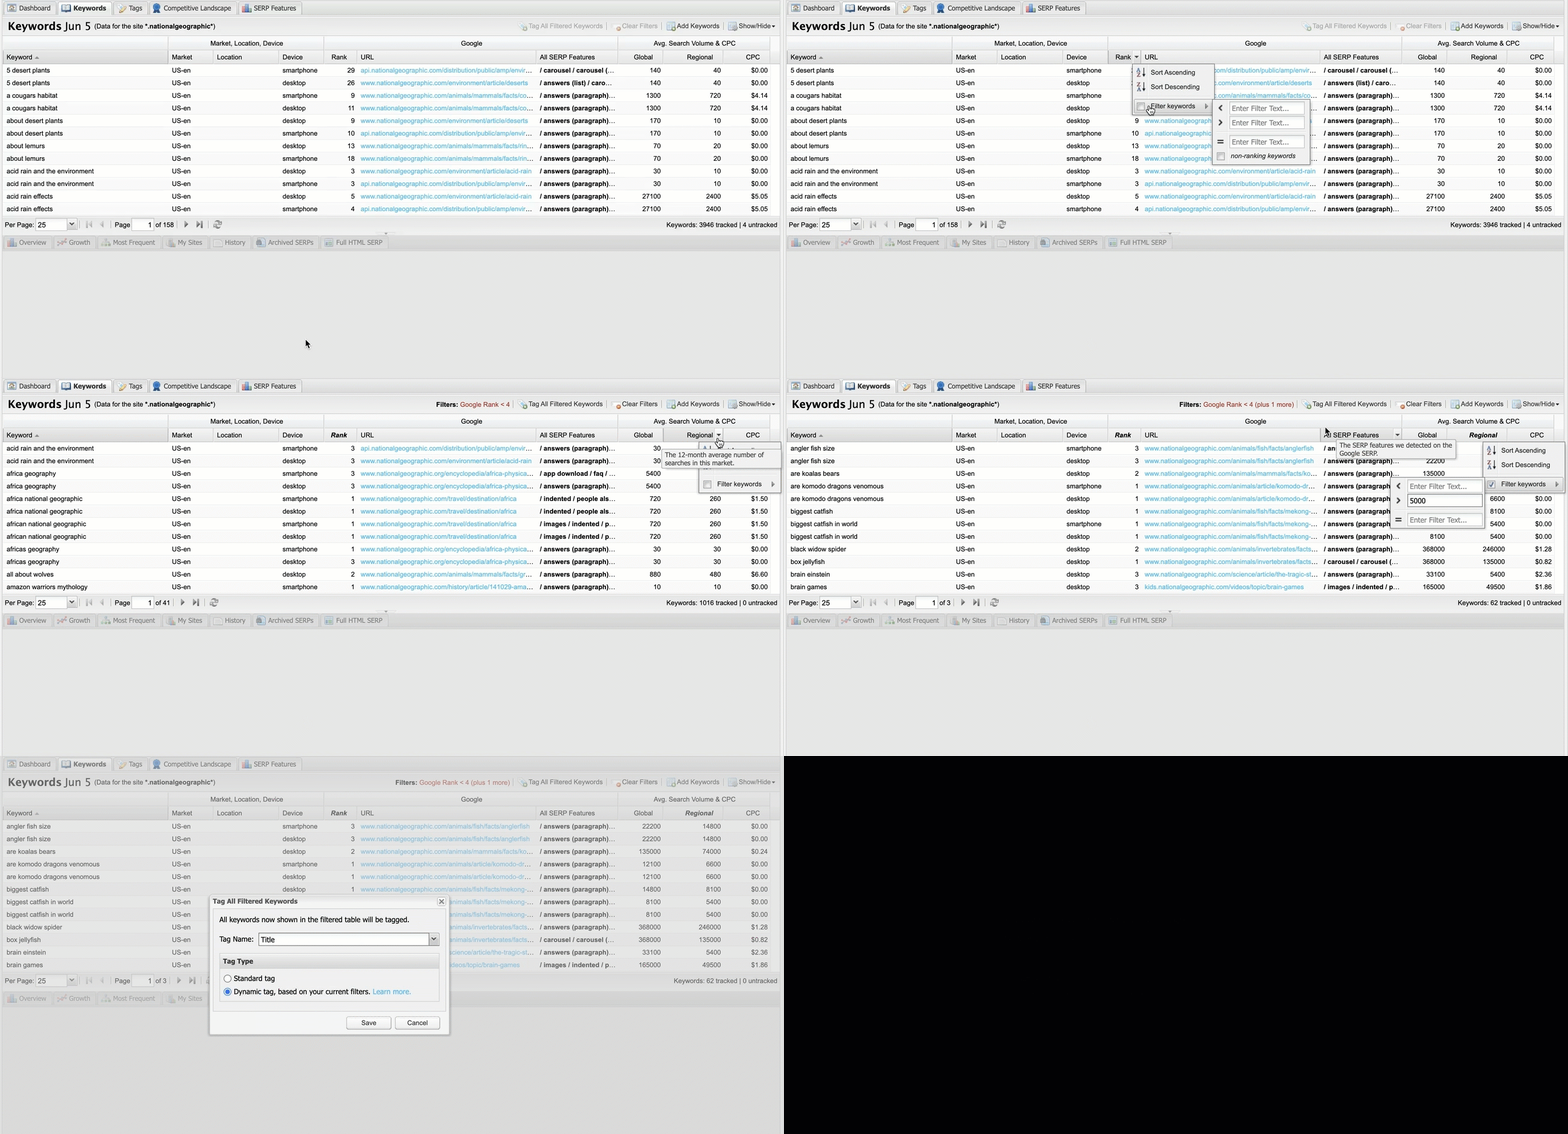
In this case, we’ll be creating a dynamic tag to capture keywords ranking for the first three results of the SERP, and those that have a regional average search volume of greater than 5,000.
Do this by going to the Keywords tab and filtering the Google Rank column. Use the drop-down arrow, select the Filter keywords box and filter by < 4. Next, filter the Regional column by > 5000.
You can choose to add further filter criteria — for example, using the Wildcard Search filter on the Keyword column to select branded terms, or on the URL column to select specific phrases or /subfolders/.
Step 3: Save your filter criteria
Save these filters as a dynamic tag to track the ongoing ranking performance of your categorized keywords. Click on the Tag All Filtered Keywords button. In the pop-up window give your tag a name and select Dynamic tag, based on your current filters.
Step 4: Set an alert
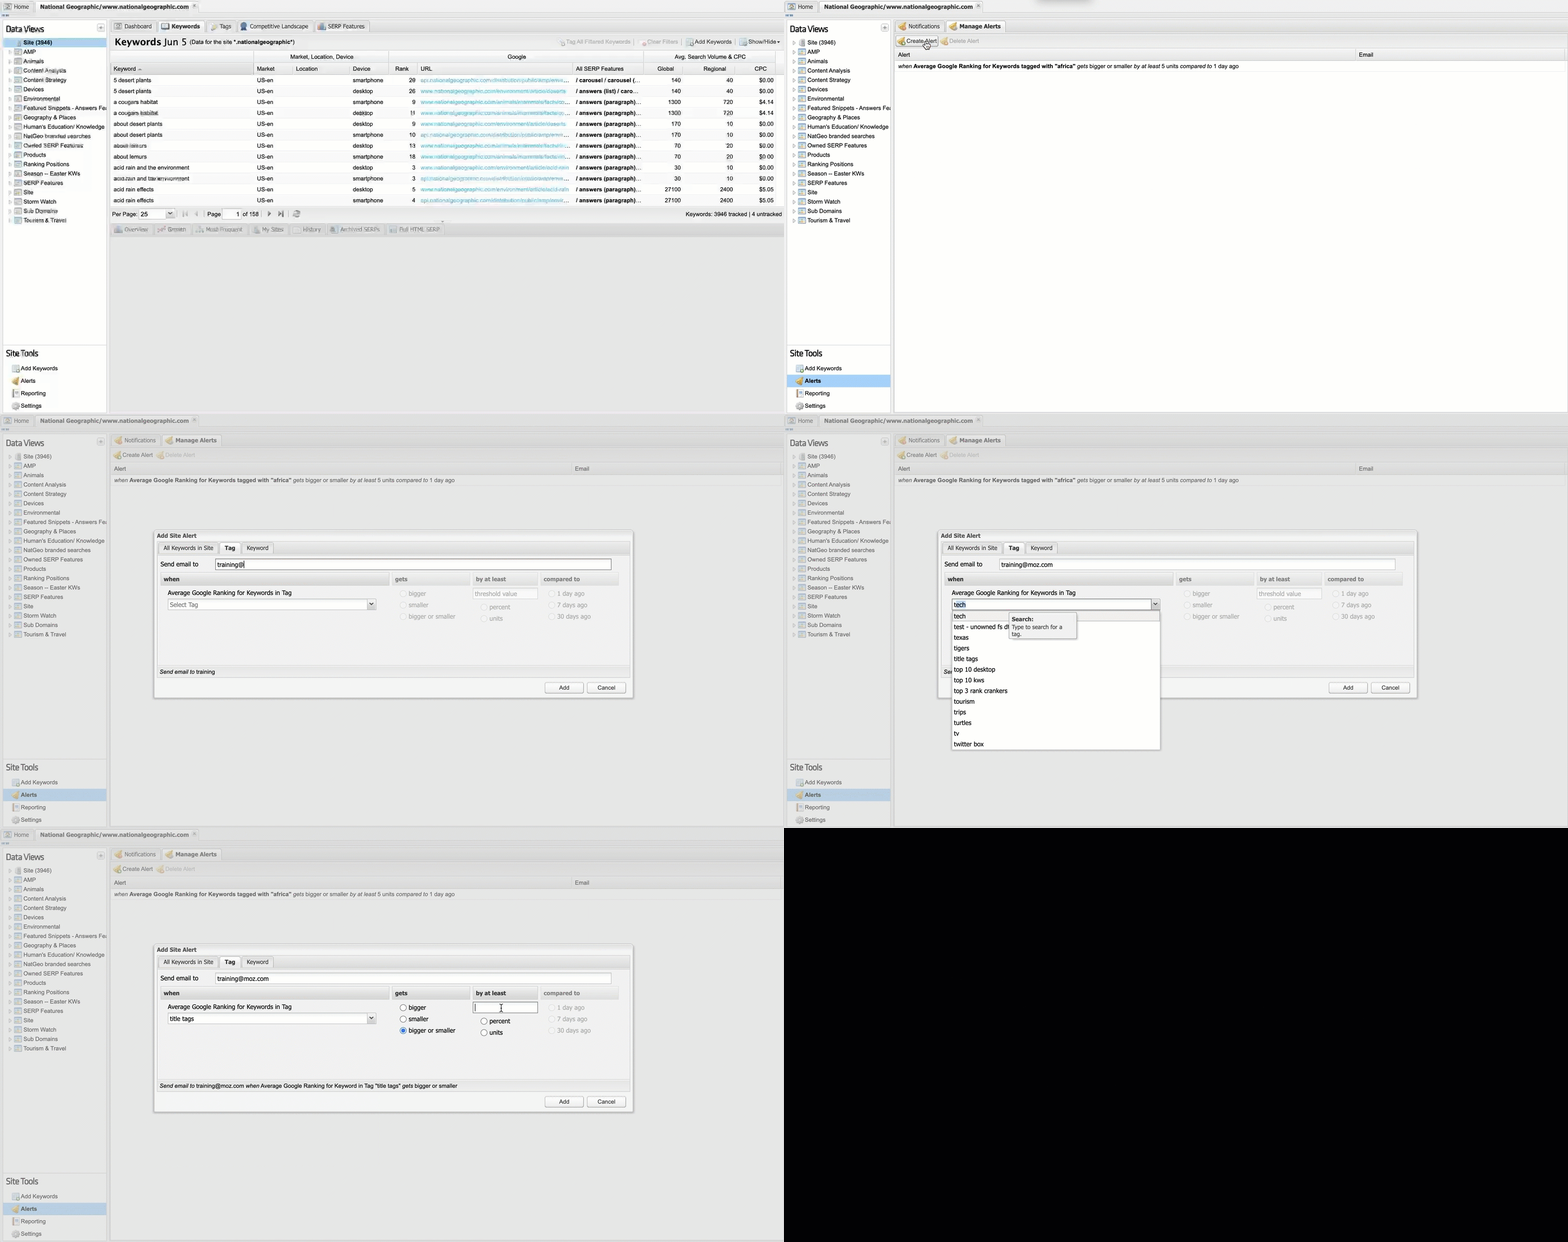
Next, create an alert to be notified when those tagged keywords have experienced a rank change over a set time period. In this case, we’ll set an alert for when the average rank for that tag increases or decreases by 25% vs 7 days ago. This will allow us to identify and confirm weekly rank fluctuation.
To do this, click on Alerts under Site Tools. Under the Manage Alerts tab click on Create Alert. In the Add Site Alert window select the Tag tab. Enter an email address for notifications to be sent.
Select the dynamic tag that you’ve just created from the drop-down box. Next, select the bigger or smaller option and enter a threshold value of 25%. Choose the 7 days ago option.
To finish, click Add to create the new alert. You’ll receive an email notification when the alert is triggered, and notifications can be viewed and deleted in the Notifications tab
Step 5: Reporting
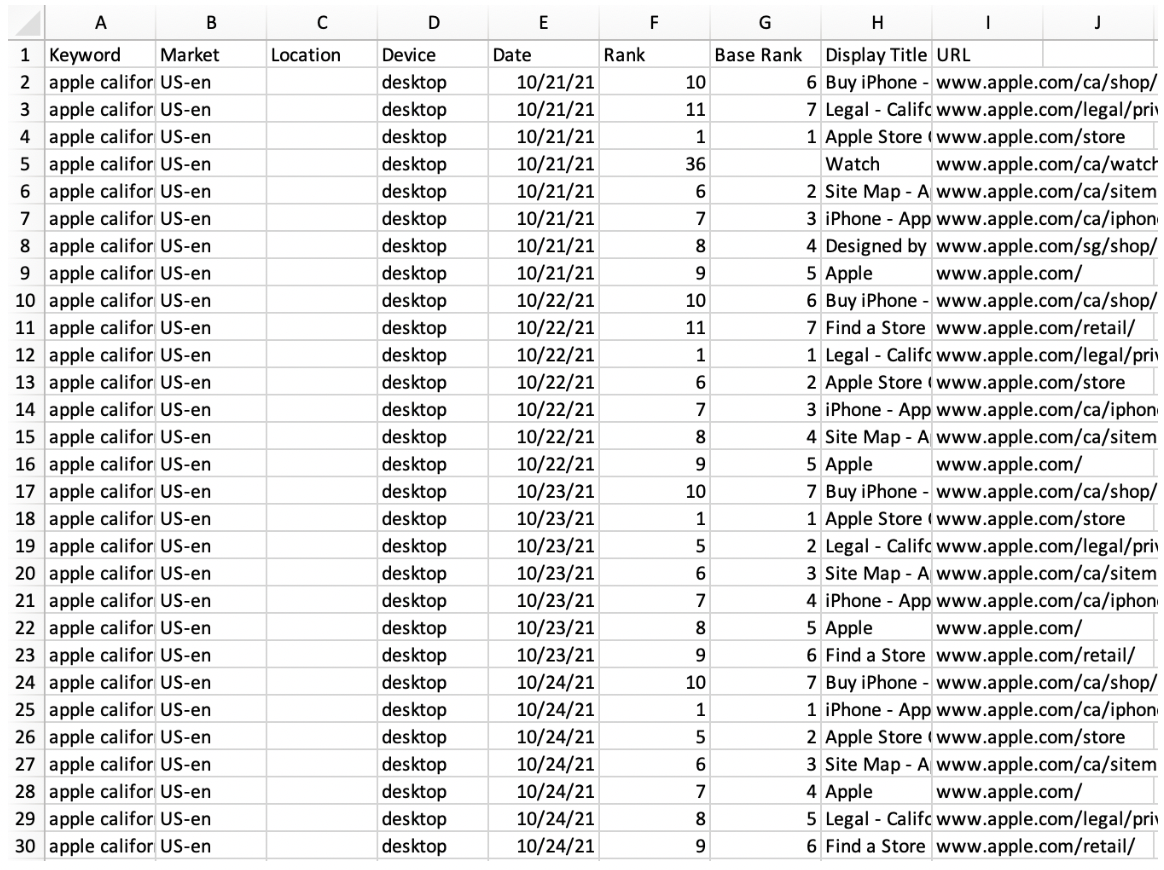
Once you’ve received an alert that those tagged keywords have experienced a rank change, download a Title Tag Tracking report. This will allow you to analyze which keywords were affected by a title change and the impact on rank performance.
To do this head to Reporting under Site Tools.
Click on Create Report. Work your way through the steps in the pop-up window.
At step 3, in the Sites & Keywords section, select the tag that you’ve just created.
At step 4, in the Date Range section, you can select a custom date range — in this example we’ll run the report for the previous two days.
At step 5, in the Data Options section, select Changed Titles Only to see just those titles that have changed from the day before. Once you’ve passed through all the steps, finish creating the report and download the CSV file.
Step 6: Analyze
Once you’ve generated the report, it’s time to dig in. For each keyword and corresponding ranking URL, you’ll be able to view the title tag and compare it to other dates in your selected date range. By selecting to include Changed Titles Only when setting up the report, you’ll see any displayed titles that have changed from the previous day. This can help to hone in on only the titles that are fluctuating in the SERPs at the time of the report pull.
Related resources:
- Check out other workflows for completing key processes in STAT.
- Read the STAT Blog for a guide on using the title tag tracking report.
- Understand the impact of title tag rewrites on the SERPs in this case study.


